

DIY: Papermaking made easy!
Are you a pen-paper kind of person? Are you the kind of person who loves how the ink spreads over handmade or recycled paper? More specially, are you the kind of person who chooses sustainability over anything? O are you all of the above? Because there's a treasure for YOU, no matter which kind you are. The treasure is making the paper by yourself. And before you let the word 'yourself' back you out, let me tell you something. It's easy. VERY EASY!
Don't wait for the perfect moment. Get those waste papers scattered all around the house because we're going to keep this ball rolling!
ADDICTION WARNING: This process is extremely fun and might get you wanting to do more.


01
Making the pulp
Traditionally, it is done by soaking paper shreds in water for 3- 4 hours and then beating them into a pulp using a big hammer-like tool, whereas machines like blenders are now used for convenience. The pulp either comes out fine or is chapped by adding the required amount of water.
02
Pulp into Paper
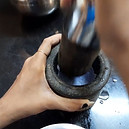
The resulting pulp is then dissolved into a container bigger than the mesh frame that is to be used. The mesh frame - circular or rectangular- is dipped into the water, where it filters out the water and holds back the pulp as one layer.
NOTE: More the pulp dissolved, the thicker the paper.
If you want to add colors or elements to the paper, it is now that such things should be added to the water before sieving through the mesh frame.


03
The Paper
Once the paper has formed over the mesh, it is very important to carefully dab out all the water using a dry cotton cloth since it has good absorption properties. Then the mesh is turned upside down over another dry cloth and is lightly tapped from the back, making the made paper be placed over the fabric. Thus separating the still-wet and fresh paper from the mesh.
04
Finishing up
The paper is then left out in the sun to be dried. Once dried, a roller or a book is used to straighten the paper since the drying might have caused the paper surface to be bent or uneven.

You can always try making these at home. It's unbelievably fun, and do not forget that it's okay if you don't get it right on your first try. I didn't, either. Remember that all these techniques were born from some kind of disarrangement or mistake. Keep spitballing and experimenting around with elements that can be added to make the paper more interesting and appealing. There's always room for improvement! Look at the paper variety I made as my work samples here.
I'm open to suggestions and feedback. I'd really appreciate it if you could help me grow by leaving them on the contact page!
Thank you!